Calendar
If ServicePRO Calendar is synchronized with Exchange, then all meetings and appointments will be synced two way between ServicePRO Calendar and Outlook Calendar.
Navigation
Click on Calendar from the Workbench grid as highlighted below.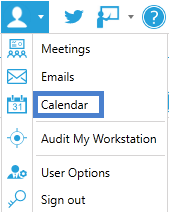
ServicePRO Calendar
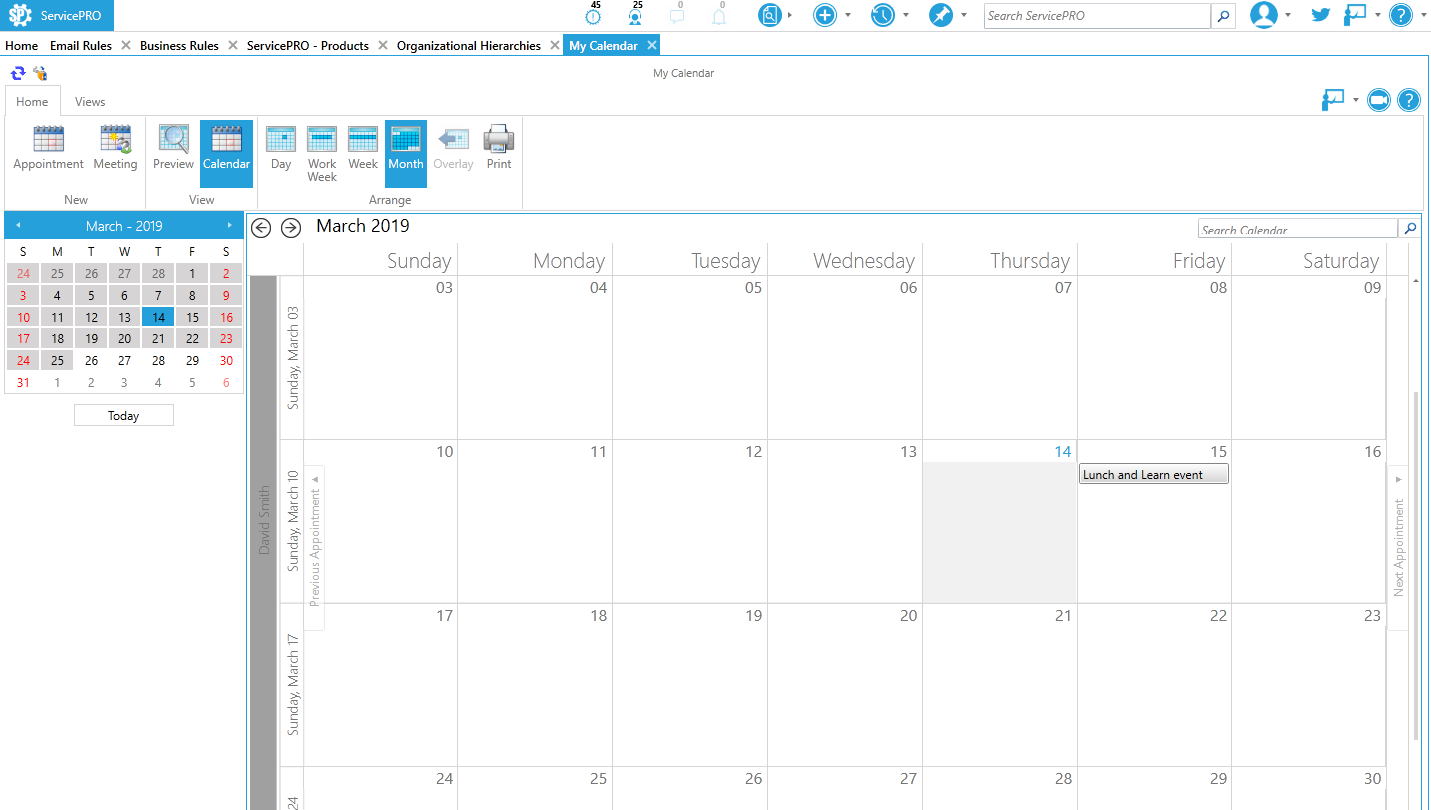
1. Calendaring Tabs
ServicePRO provides you with tools to create and access different calendar views.
- Home – provides you with the tools you need to work on your meetings and appointments, and to view calendars of other users.
- Views – Provides calendar views of various objects.
2. Ribbon Toolbar
When working in the Calendar, you have many tools at your disposal organized into four task groups:
- New – Add appointments and meetings to your calendar.
- View – Change the view to show the calendar only or add a preview.
- Arrange – Change the layout of the calendar. Overlay option displays your own calendar along with the other shared calendars.
- Shared Calendars – Check the boxes for the listed participants to view their calendars in the display area.
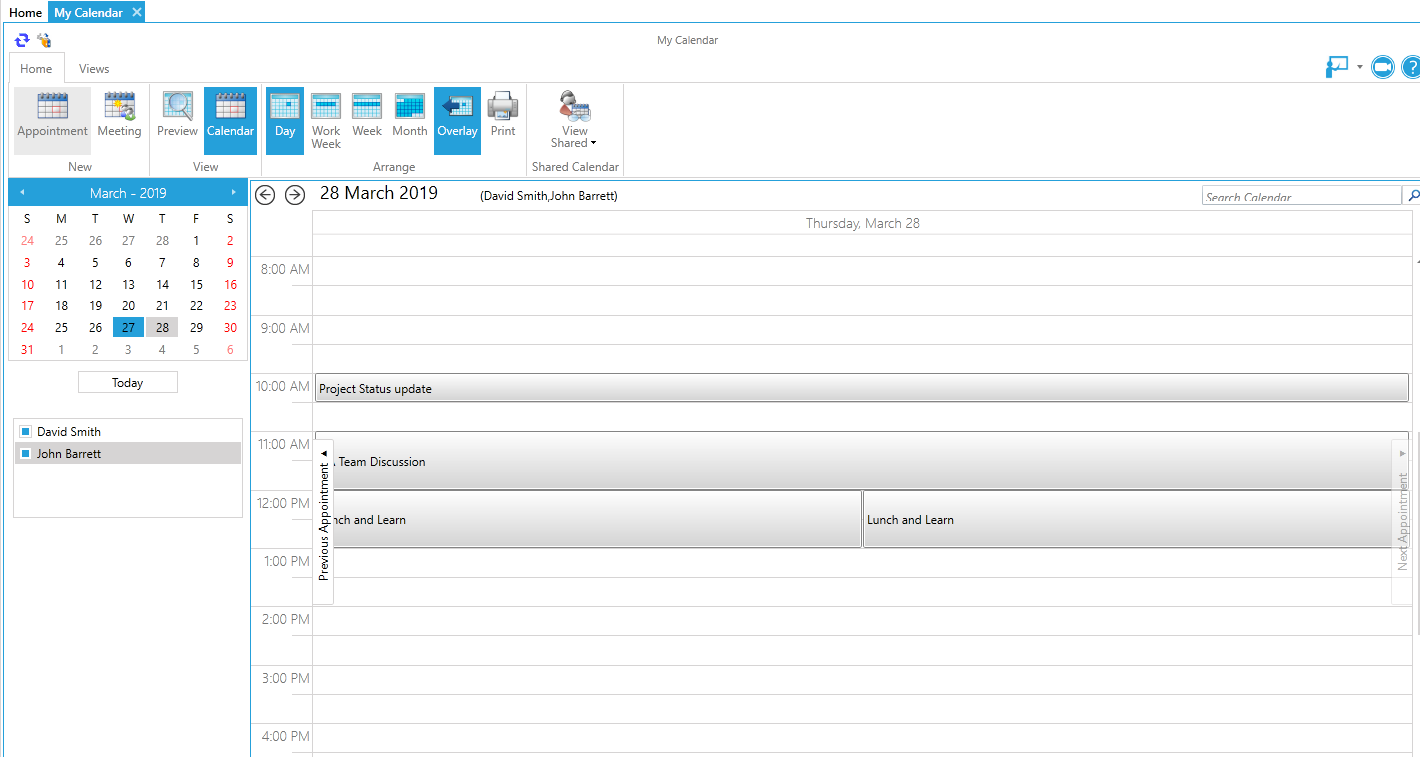 Overlay View
 Shared Calendar View
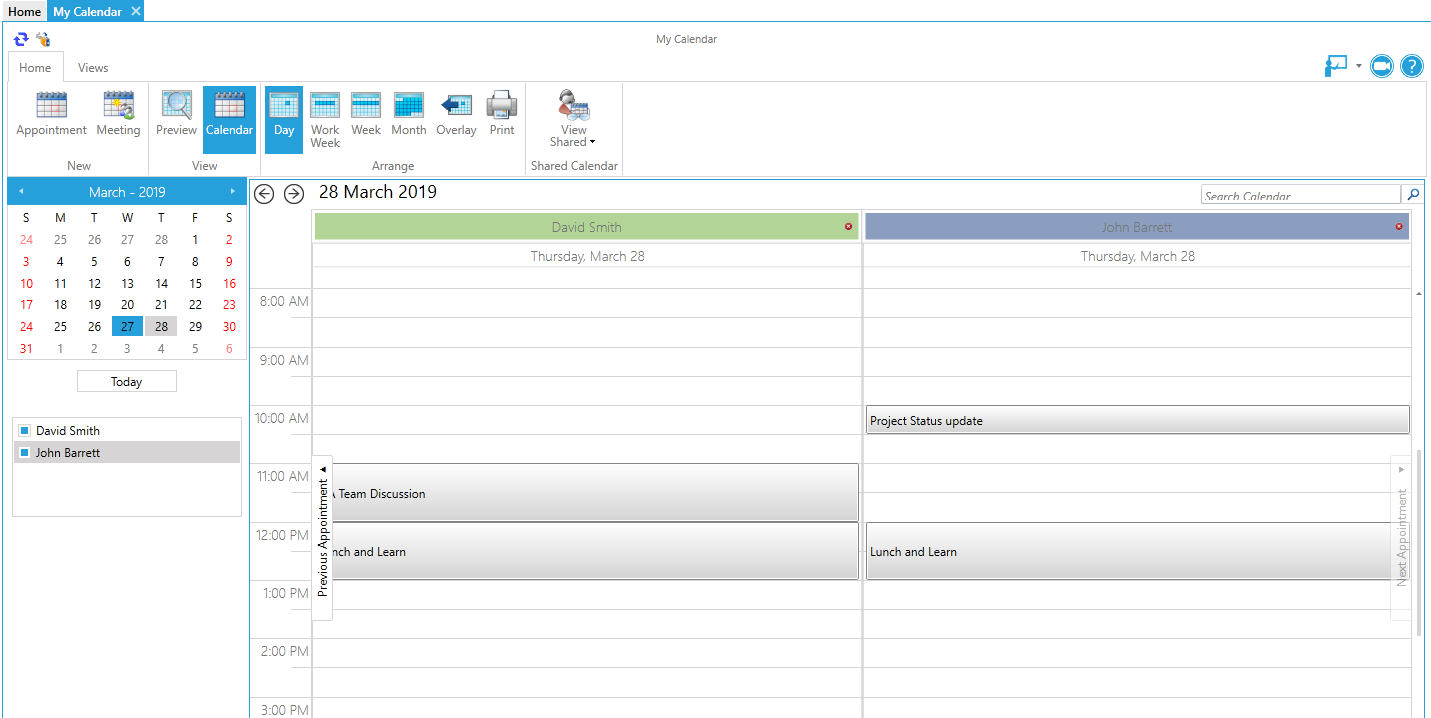
3. Calendar Date Selection Area
Use the calendars in this area to select the date on which you want to schedule, view, or update an appointment or meeting. The area displays two consecutive months for your convenience. Use the arrows above the calendar to select the months and the year that you want to display. Click on the Today button to have ServicePRO display calendars for the current date.
4. Appointment Display Area
By default, your own calendar is displayed in this area with your scheduled appointments and meetings. You can choose to display other user’s calendars by clicking on the View shared icon and selecting user(s) from the list on the left.
Creating New Appointments
- Create a new appointment by selecting the date on which you want to schedule the event.
- Highlight the time slot by clicking and holding down the left mouse and dragging the cursor to include the desired times.
- Click Appointment option in the ribbon toolbar. The Appointment window opens as shown below.
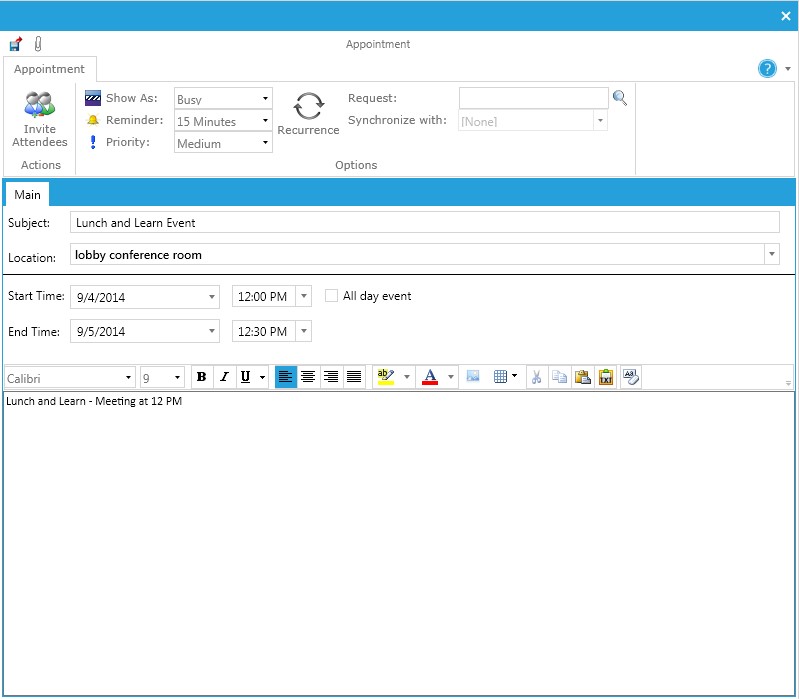 Create New AppointmentNOTE: If you are attempting to schedule a new appointment when all or part of the time is already allocated to another event, the message “Conflicts with another appointment on the calendar” will appear just above the subject entry line.
 - Define the options for the new appointment. Set the Show As item to display how you want the system to show your availability during the scheduled appointment.
- Set the Reminder to determine when the system should send reminder about the meeting.
- Set the Priority of the appointment.
- Enter the Request number that correlates the meeting. Click on the magnifying glass icon if you need to search for the request number.
- Click on the Synchronize with field if you want the appointment to be synchronized with the time and date the work begins, or synchronized with the due date in the selected request.
- Click on the Recurrence icon if you want to schedule an appointment that will recur over multiple days.
- Enter the purpose for the appointment in the Subject line.
- Define where the event will occur in the Location line.
- Enter a message describing the appointment in the message area. Use the editing tools to format the message as you wish.
- If desired, click on Invite Attendees in the Actions task group.
NOTE: If you use the Invite Attendees feature in the Appointment tab, ServicePRO recognizes that you are essentially creating a meeting and changes the new appointment to a meeting.
- Click on the To… button to select the list of attendees you want to invite.
- Click on the Send button to complete the scheduling of the appointment and to send an email to the attendees. The new appointment (or meeting) will automatically display in your calendar and all the calendars for the invited attendees.
Creating New Meetings
- Create a new meeting by selecting the date on which you want to schedule the event.
- Highlight the time slot by clicking and holding down the left mouse button and dragging the cursor to include the desired times.
- Click on the Meeting icon in the Ribbon Toolbar.
- The Meeting window appears as shown below.
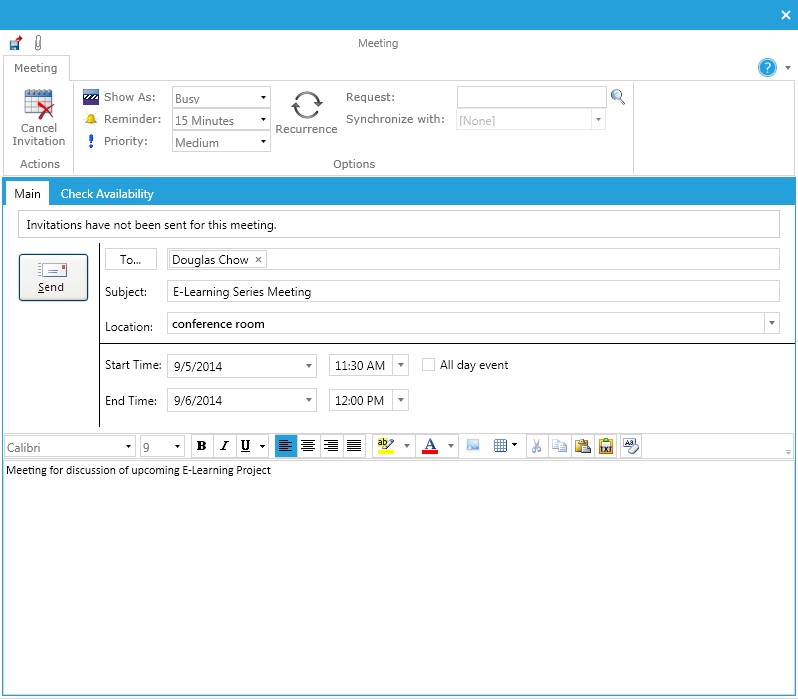 Create New Meeting
 - Define the options for the new meeting. Set the Show As item to display how you want the system to show your availability during the scheduled meeting.
- Set the Reminder to determine when the system should send reminders to the attendees.
- Set the Priority of the meeting.
- Enter the number of the Request that correlates with the meeting. Click on the magnifying glass icon if you need to search for the request number.
- Click on the Synchronize with field if you want the meeting to be synchronized with the time and date the work begins or the due date associated to the selected request.
- Check the Private box if the meeting will be set for invited attendees only.
- Click on the Recurrence icon if you want to schedule a meeting that will recur over multiple days.
- Select the attendees from the To button.
- Once you add the attendees, the Check Availability tab appears and you can check the availability of all the attendees against your calendar and set the meeting time accordingly.
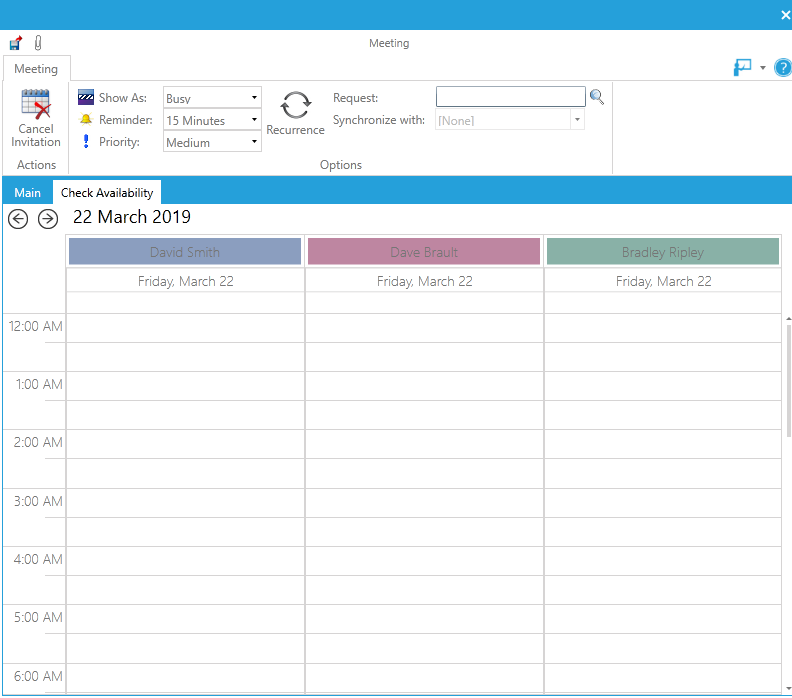 Check Availability
 - Enter the purpose for the meeting in the Subject line.
- Define where the event will occur in the Location line.
- Enter a message describing the meeting in the message area. Use the editing tools to format the message as you wish.
- Click on the Send button to complete the scheduling of the meeting and to send an email to the attendees.
Working with Calendars
Users can look at a representative’s calendar to see the appointments and meetings scheduled. They can double-click on an appointment or meeting to see the details of that scheduled event. When someone clicks on a specific appointment or meeting, View and Update icons within the ribbon become active so they click on these icons to view or update the event as needed.When you do associate an appointment or meeting with a request, that event will be added to the activity stream for the associated request. The system stamps the activity stream with the information that an appointment or meeting was made, when it was made, and includes the information typed into the memo. To see the actual appointment or meeting, you can click on the View Appointment link shown in the activity stream.
Scheduling Appointments/Meeting from a Service Request
When users are inside a request, they can also set up a meeting or appointment from within the request using the Schedule option in the Actions task group of Service Request ribbon toolbar as displayed below.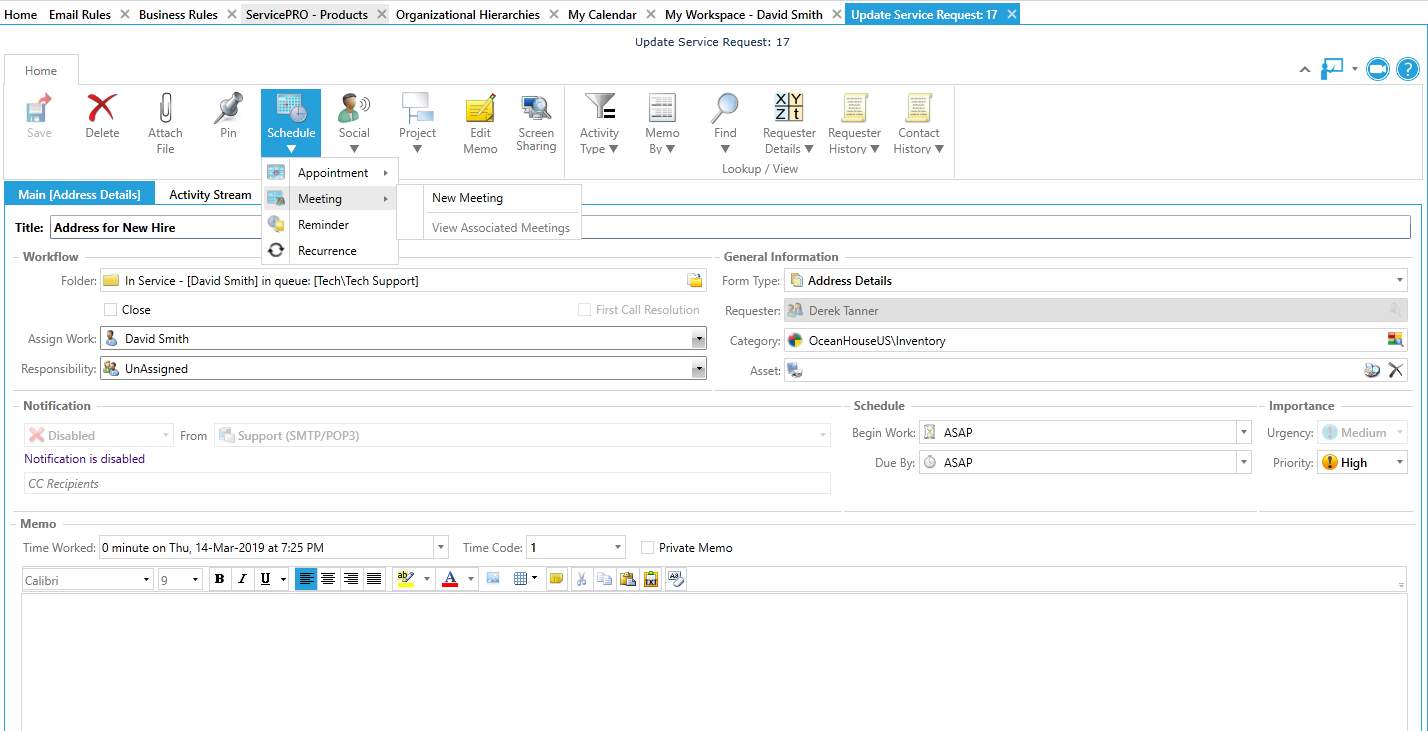
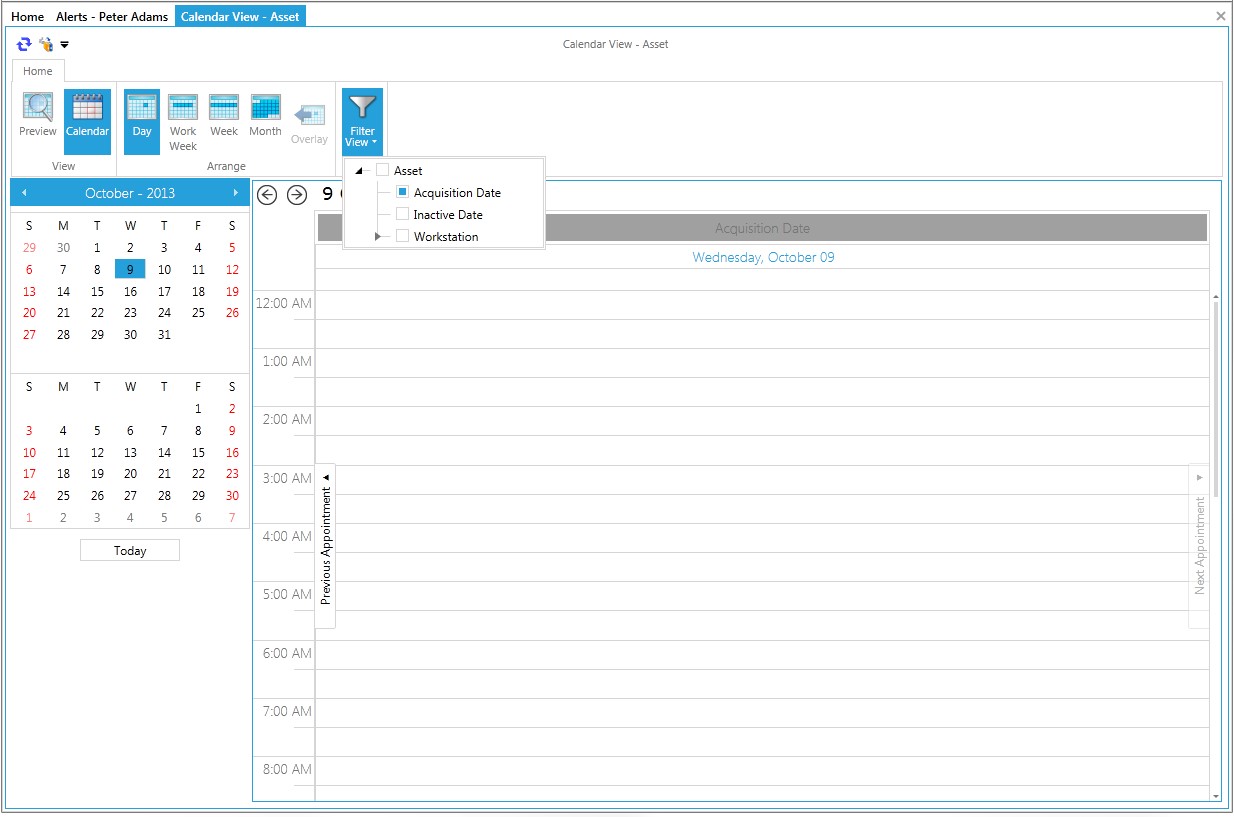
Views Tab
On this tab select an object to view a calendar based on a date field on that object.The example below shows an Asset calendar with the “Filter View” set to display assets based on acquisition date.