Email Inbox
Return to Collaboration and Communication
Email Inbox
The Email Inbox allows privileged users in ServicePRO to create or update service or purchase requests by using messages that are available in their local Email accounts.
Accessing the Email Inbox
Using your Email Inbox, incoming emails can be easily brought into ServicePRO for creating or updating requests and projects.
- From the ServicePRO Workbench, click on the Email Inbox tile.

- The Email Inbox window opens as shown below. The left pane shows the messages in your inbox. You can view the details of those messages in the right pane, and do appropriate updates from the Ribbon Toolbar.
Ribbon Toolbar

Create New
This section of the ribbon displays options to create a request or project from an email. Clicking on one of the options creates the respective object from the selected request.
- Request – Create a new Service Request.
- Purchase Request – Create a new Purchase Request.
- Project Request – Select a Project Request template to create from this Email.
- Quick Request – Select a Quick Request template to create from this Email.
Calendar
This section of the ribbon displays options to respond to Meeting invitations in your Email Inbox. Once you select the meeting in the Message Inbox, you can click one of these Calendar options:
- Accept – Accept the meeting.
- Tentative – Set the meeting as Tentative.
- Decline – Decline the meeting.
- Propose New Time – Set a new time for the meeting.
- Respond – Reply to the selected Email.
Synchronize Email Server
This section of the ribbon displays options to delete emails as well as manage the messages list. The options include Check for new emails, Today (displays only Email received today), This Week (displays only Email received this week).
By default, 20 emails are visible in the Message List, and the next 20 become visible on demand (when you scroll).
- Delete – Delete Emails from the Inbox.
- Check for New Emails – Refresh the Inbox Pane and check for new Emails.
- Today – View Emails from today only.
- This Week – View Emails from this week only.
Update
Update Request – This section of the ribbon displays an option to update a request or project from an email. Clicking on this option opens the Find a Request dialog.
Messages In
This section of the ribbon displays the Email account, such as your Outlook, that integrates with ServicePRO.
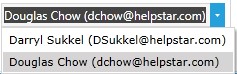
You can configure this account in the User Options icon from the Workbench, then selecting the Email tab. If any other user, on the same Mail Server, has enabled Allow others to check my emails in his User Options, then you can select this user from the Messages in drop-down menu. You can then view this user’s Email (i.e., the messages that arrive in his Email account) and use them to create or update requests. For more information, see the Help topic for User Options.
Options – Account Settings
This section of the ribbon displays an option to update your Email account settings in ServicePRO. Clicking on this option opens the Email Setup screen from the User Options dialog.
This is essentially a shortcut to the same dialog that you open by navigating to User Options > Email.
Email Inbox Panes
Inbox Pane – Message List
The Message List shows the emails that have been retrieved from the local Email account. In the Message List, you can select an Email and add it to an existing request or to create a new request or project. You can search the Message List for a particular email, by entering a word or string in the Search Email Inbox.
Preview Pane
The Preview pane displays a preview of the Email currently selected within the Messages List.
Adding a New Item from a Message
- Select the Email you wish to bring into ServicePRO.
- Click on the appropriate icon from the Create New section of the ribbon. Options include:
- New Service Request
- New Purchase Request
- New Project
- New Quick Request
Updating a Service Request from a Message
To update an existing request with an Email do the following:
- Select the Email you wish to bring into ServicePRO.
- Click on the “Update Request” icon on the ribbon. This will display the following window:
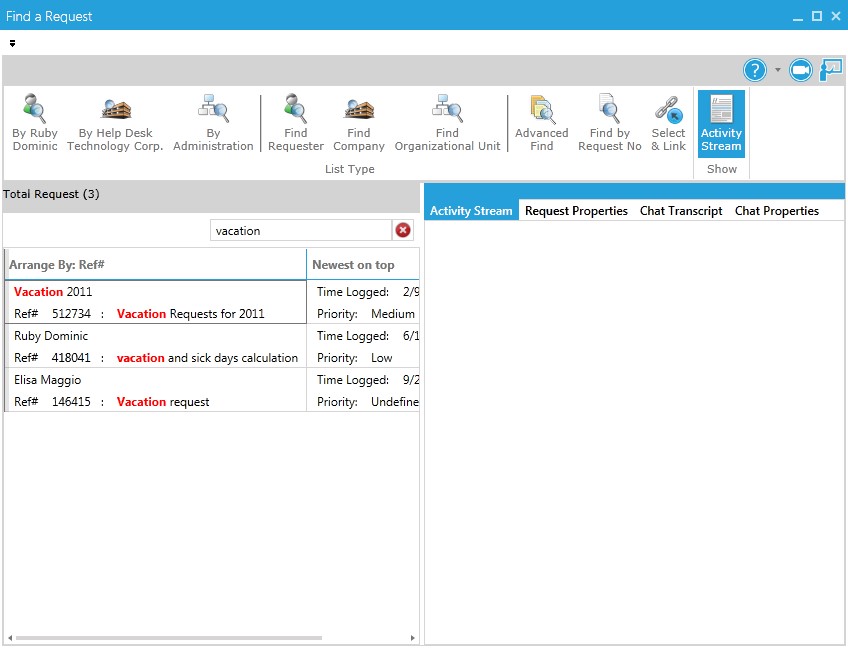 Find A Request
 - By default, the window will display a list of requests where the sender of the selected Email is the requester however you may also show all requests from the sender’s company or Organizational Unit. If the request to be updated is not found in either of these lists you may use the “Advanced Find” or “Find by Request Number” to find the request.
- Select a request by either double clicking on the request or by clicking on the “Select & Link” button on the Quick Access Tool bar. This will bring up the request in a “Detailed Update” mode with the Email contents pasted in the memo area, as below:
 Updating a Request
Creating a New Request
To create a New Request using the Email Inbox:
- In the Messages List, select an email.
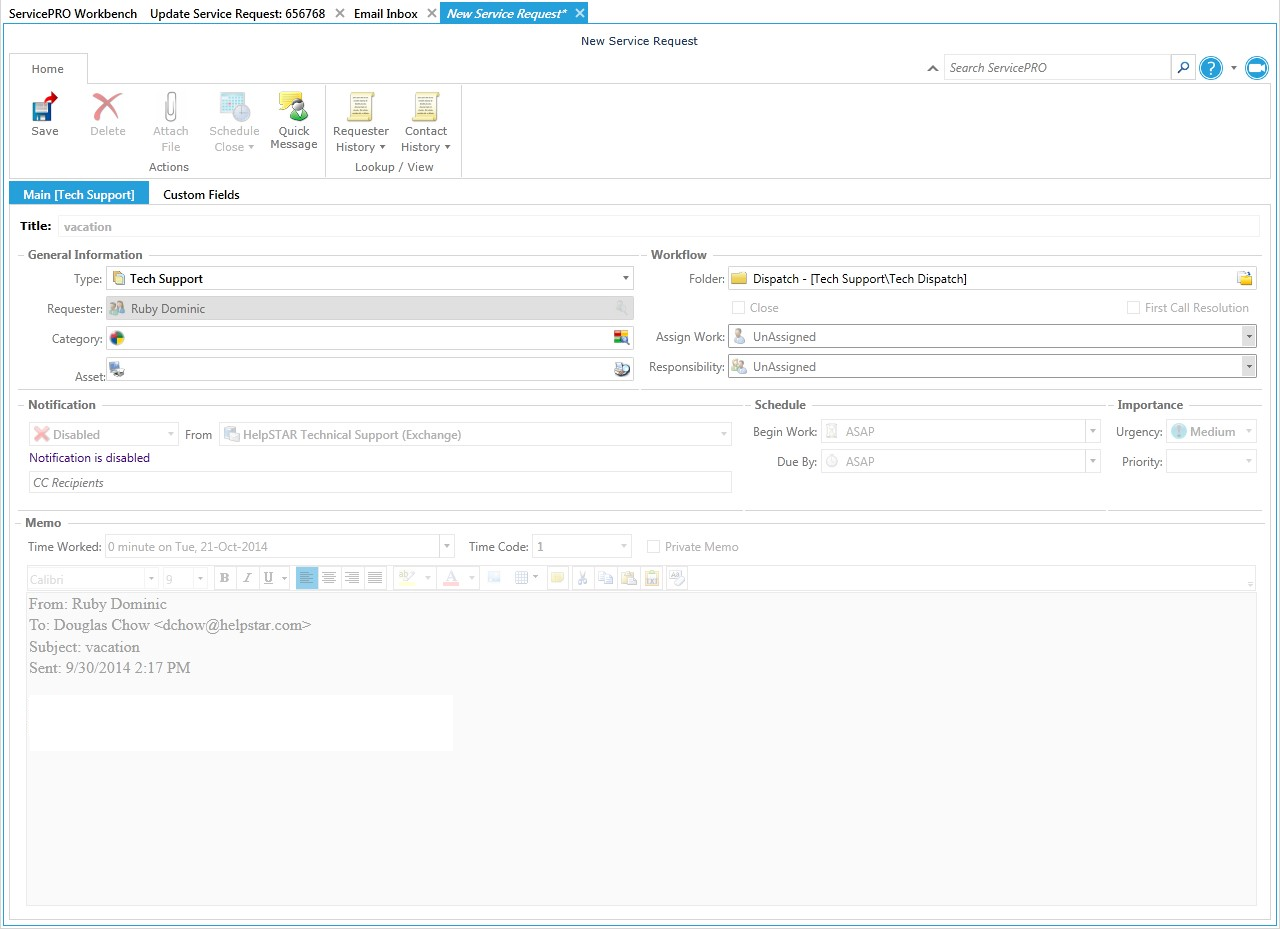
- Click on the Request icon with the Create New group of the ribbon. The New Service Request window appears, where you can create a request.
- The subject line of the Email appears as the request Title, and the header and the body of the Email displays in the request Memo.
The header information and first two lines (or 590 characters) of the body of the Email appears in the request Memo. To see the entire body of the message (plus the header information), see the link in the request with the label, Click for details…With you mouse pointer over the link, press Ctrl + click your mouse to open the full message in a pop-up, titled Email Details.
- Note that any attachments to the Email message are also in the Click for details pop-up. In the pop-up, you can find attachments in the Attachments tab.
- You can change the display of the Email in the request by navigating to User Options > Email Setup options. Instead of the Summary with link to Email, you can view the Entire email. See the field labeled, In ‘Preview’ panel show. If you choose the option to see the entire email, attachments are not available.
The following screenshot shows an example of a new request being created from an Email message, where the body of the message has been added to the Memo as a Click for Details link.
If the sender of the Email is already in the ServicePRO database, the Requester of the New Service Request will automatically be set as the sender’s name.
Before saving the request you must select a Category, and you can add notes to the Memo field, as well as make any workflow changes, as necessary. After saving the request, ServicePRO gives you a reference number.
Setting up the Email Inbox
To set up the Email Inbox functionality, an administrator must first configure the mail system:- Select the Setup/Administration tile from the Workbench.
- In Setup/Administration, under the Configuration tab, select User Email Accounts. The Configure User Email Settings dialog opens.
 Configure User Email Settings
 - From the dialog, click on the Mail Server Settings icon, as in the screenshot, below. A second dialog opens with fields for the Mail Server Settings.
- Enter the Mail Server Settings.
- Click the "Save" button. Then, the administrator must configure the Support Rep’s local Email account settings:
- Close the second dialog with the Mail Server Settings.
- In the first dialog of Configure User Email Settings, which is still open, select a User’s name from the Support Rep drop-down. (See the Support Rep field in the screenshot, below.)
- In the "Email Account Properties", set and enter the Email details for that Support Rep. Support Reps can set their local Email accounts themselves by navigating to User Options > Email.