Queries
Return to Data Analysis
Overview
Query designer allows you to produce a quick list of a specific criteria and display any relevant fields in a tabular format to get a snapshot view of a particular dataset.Navigation
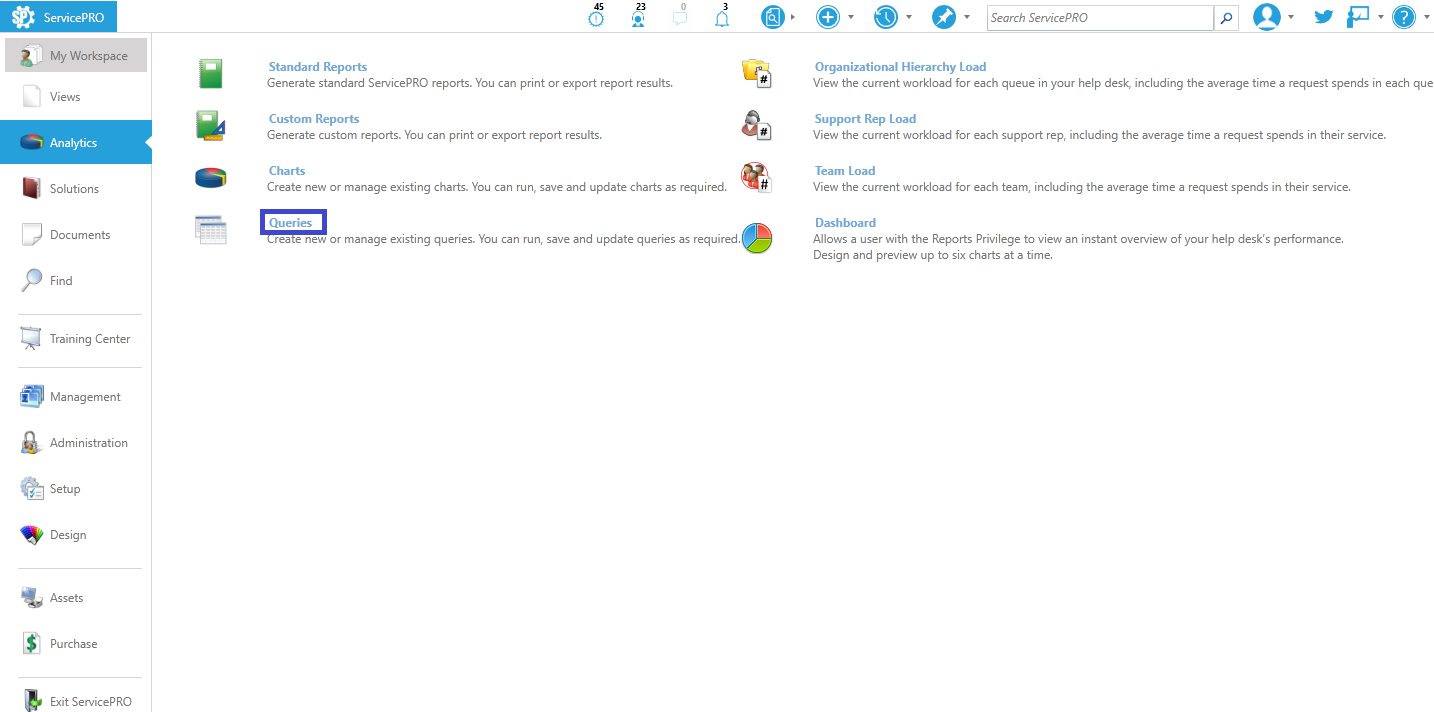
- Navigate to the backstage menu by clicking on the ServicePRO icon.
- From the Analytics tab, click on the Queries option as highlighted below.
 Queries Navigation
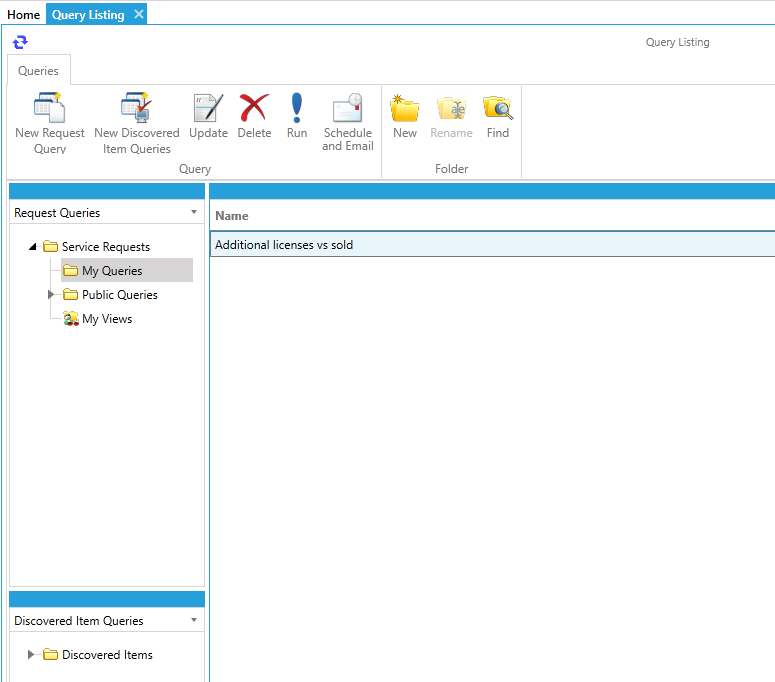
Query Listing Ribbon Toolbar
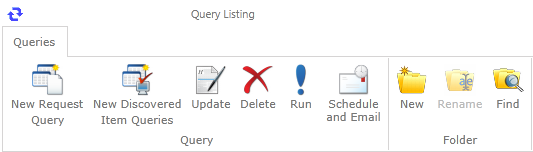
Query
- New Request Query: Create a New Request Query.
- New Discovered Item Queries: Create a New Discovered Item Query.
- Update: Update and edit the selected query.
- Delete: Delete the selected Query.
- Run: Run the selected query.
- Schedule and Email: Set up schedules for emailing queries to designated users.
Folder
- New: Create a new folder.
- Rename: Rename an existing folder.
- Find: Find a folder.
Left Query Folder Panes On the left panes, users can navigate between folders where Queries are stored. You can select from one of the following options:
- My Queries: View queries that you have created and saved.
- My Views: Preview a list of previously created customized views.
- Public Queries: View queries that have been created by yourself or another user which have been saved as Public. These queries will be grouped by the user who created them.
Discovered Item Queries
- My Queries: View Discovered Item queries that you have created and saved.
Query Designer Window Click on the “New Request Query” icon to bring up the Query Designer Window. Queries can be created to filter and view specific data about service requests. You can save queries for future use and make them available to others. The Query Designer window is shown below:
The Request Field Selection work area provides a tree view of the database fields available to view or set conditions on. Expand items and use the checkboxes to select the fields you want to use in the query.
As fields are selected, they appear in a table in the Design and Preview work area. Use this table to refine your query by applying various criteria.
Refining Request Queries
- View the settings for any cell in the Design and Preview tables by clicking in that cell.
- Caption column shows the field name that will appear in your query.
- Click in a cell in the Show Field column to view or hide that field in the query result. Use the drop-down list in the cell and select “Yes” to view the field or “No” to hide it.
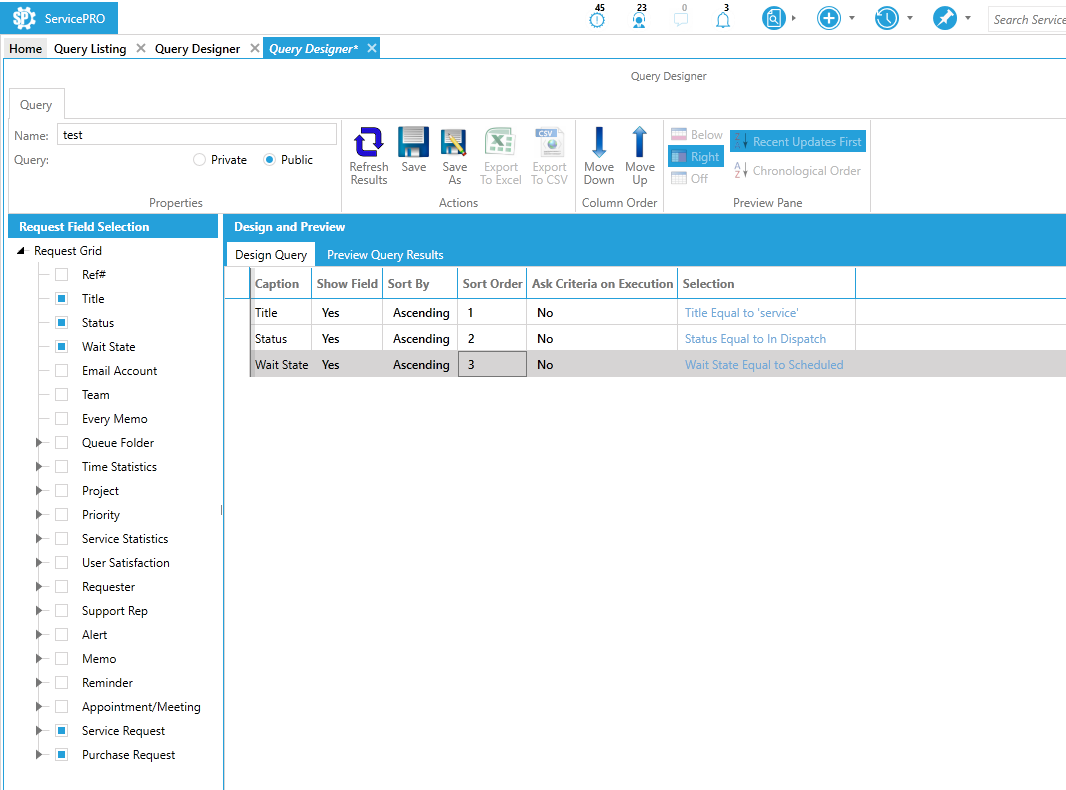
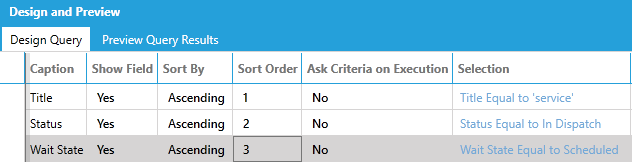 Query Designer with Fields Selected
 - Click in a cell in the Sort By column to sort the data in the column in ascending or descending order. Leave this value at “None” if you do not want to sort.
- If you chose to sort your query (in the previous step), define the sort order for each query item by entering a value in the item’s cell in the Sort Order column. For example, if you wanted to sort the query by Title then Status then Wait State you would enter a “1” in the Sort Order cell for Title, a “2” in the Sort Order cell for Status then a “3” in the Sort Order cell for Wait State.
- Click in a cell in the Ask Criteria on Execution column to define whether you want to be asked for a selection criteria for the field when you run the query.
- Click in a cell in the Selection column to enter criteria for the field. A window similar to the one shown below appears.
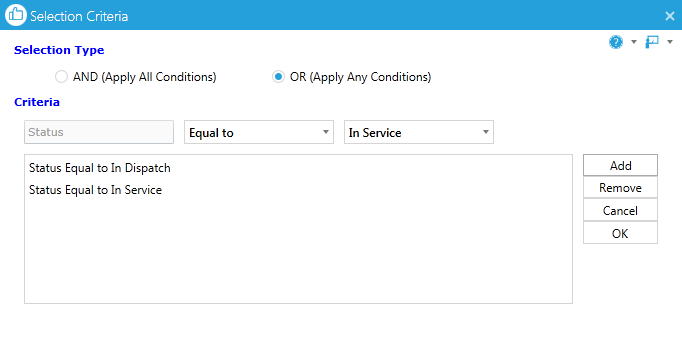 Selection Criteria Window
 - Click on the And or Or Selection Type radio button to select the operator you want to use to combine your search strings. In the example above, the search would find requests that are either “In Dispatch” or “In Service.”
- Under Criteria the first box displays the field on which the filter criteria will be set. The second box displays a dropdown option with the criteria for matching such as ‘Equal to/Not Equal to’ and the third box displays options for entering the value (either a drop down or text box).
- Click on the Add button.
- Repeat steps 9–10 to add additional conditions.
- To clear a condition, highlight it and click on the Remove button.
- Click on the OK button to save your selection criteria.
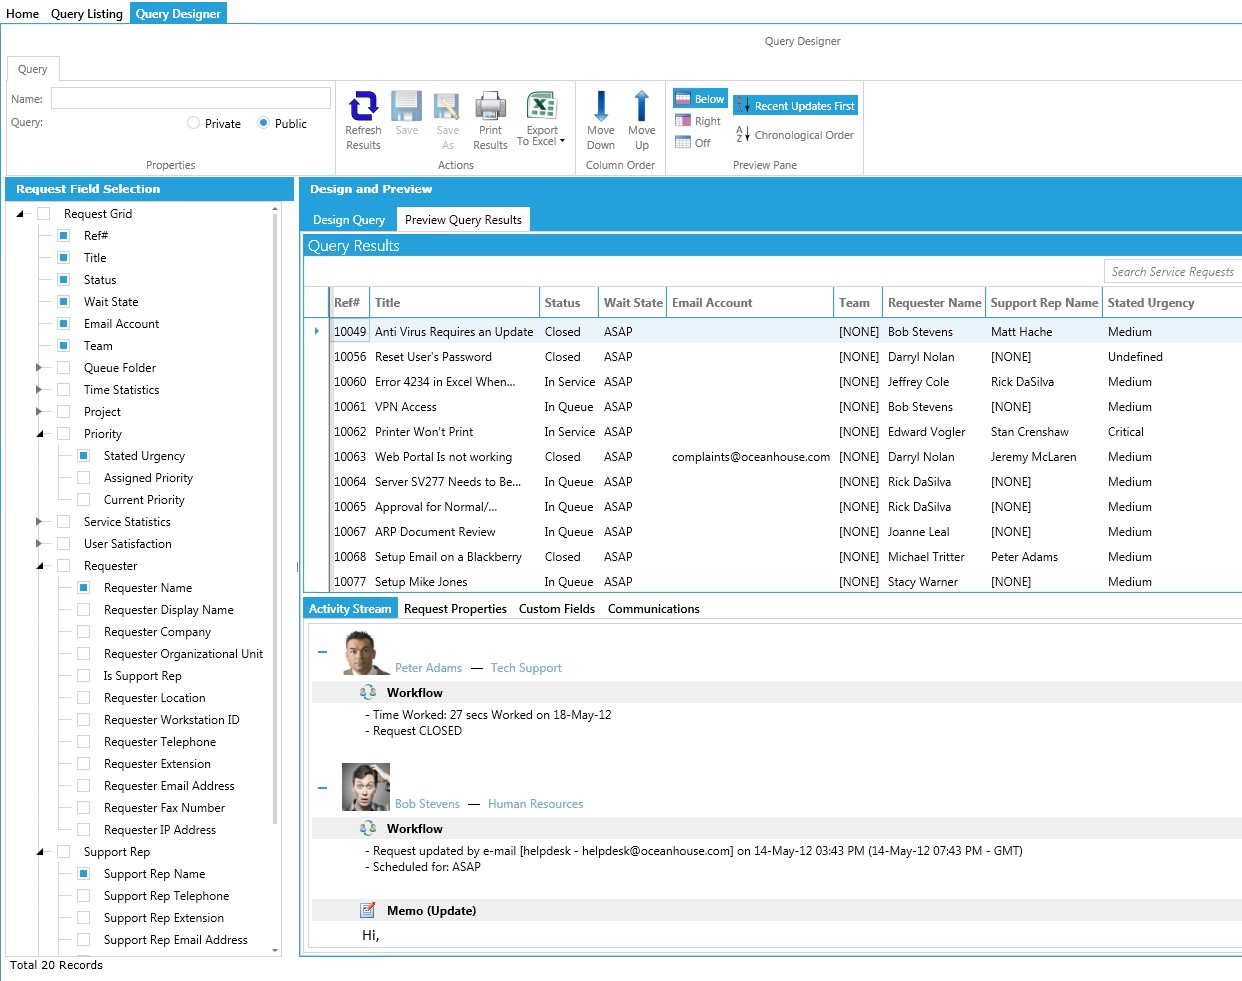
As you design your query, you can test it by clicking on the Preview Query Results tab to view results as shown in the figure below
Saving Queries
- When you are satisfied with the query, use the Name work area to enter a name in the Query field.
- If the query should be available to other users with “Data Analysis” privilege, click on the Public radio button.
- If the query should only be accessed by the creator, click on the Private radio button.
Running Queries
- From the Data Analysis tab, click on the Queries icon and select a Query folder.
- Select a Query from the right pane.
 Results Preview Tab
 - Double click the query you want to run, or select the Run button from the Ribbon Toolbar. The results will display in a grid similar to that shown in the figure below.
- Double-click on a request to view its details.
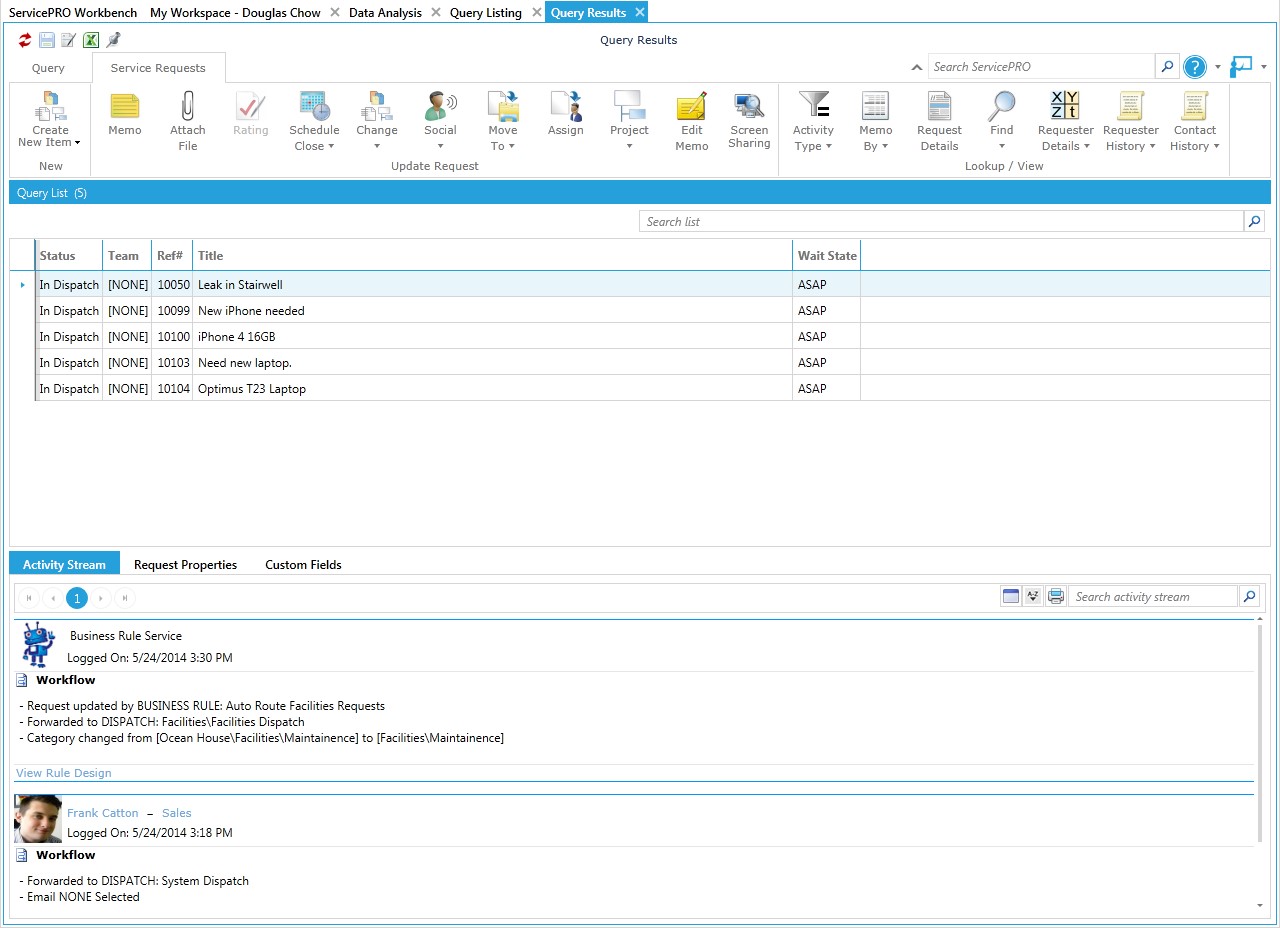 Query Results
Emailing Queries
Users can email queries to themselves or other users by selecting Schedule and Email from the Query section of the ribbon toolbar.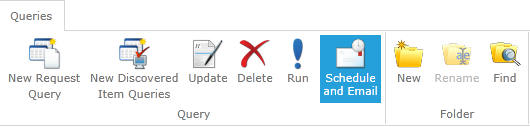
A Schedule and Email Query prompt will appear.
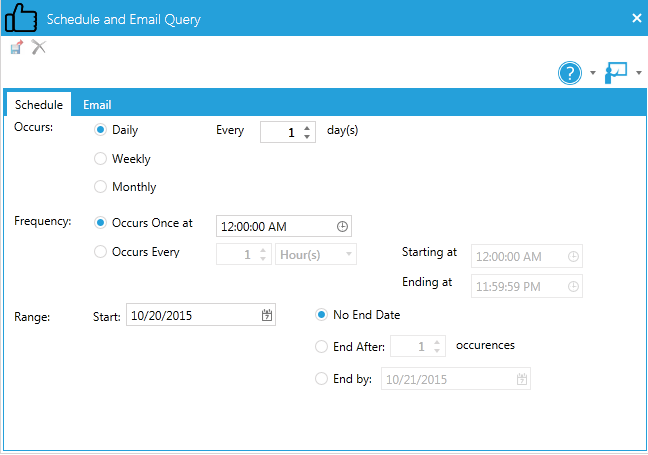
Schedule Tab
In this section, users can set up schedules and designate the occurrence, frequency and time range when emailing a Query to other users.- Occurs - Select from Daily, Weekly, or Monthly occurrences, and how often the scheduled email is sent.
- Frequency - Select the frequency of scheduled emails sent within a day by selecting time intervals. Select between:
- Occurs Once At: A designated time once in the day.
- Occurs Every: The frequency occurrence in hours or minutes throughout the day. Users will also need to provide a time at which the schedule starts and finishes being sent for this day.
- Range - Select the date range for which these scheduled emails occur. The Start date can be designated by a calendar prompt, while the end date has several options:
- No End Date
- End After X occurences
- End By a specific date
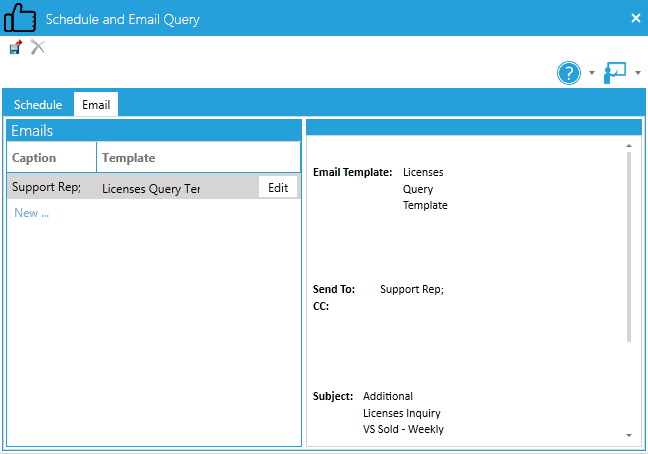
Email Tab
In this section, users can design a customized Email template which will be attached to the email in Excel format to send along with the scheduled Query Email. Email templates are listed in the left pane, and the template's details are designated in the right pane.Users can choose to Edit templates by selecting the Edit button in the right column, or create New email templates by selecting the "New ..." link under the Captions column.
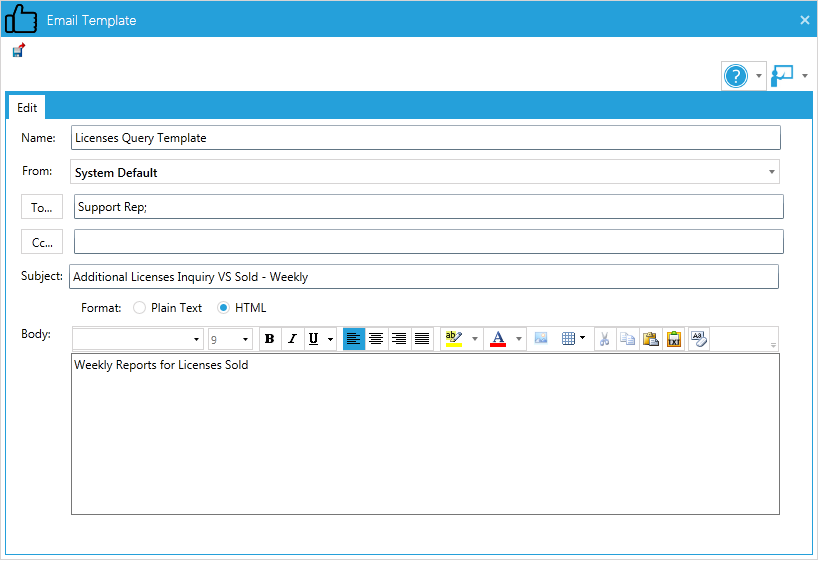
Email Templates
Similar to other email template fields, users can design the automated email message and select its recipients, as well as the sender of the template. The Name text field is the label used for the template.The scheduled query will be included along with the template automatically.
If a query does not contain any records at time of being generated for emailing, by default, only the original creator of that query will receive notification email(s) stating that there are no records.
If the creator does not wish to receive the email, an option to switch the no records notifications to be sent to all the notification email recipients instead. Please contact ServicePRO Technical Support for more information and assistance in enabling this feature.