Manage Companies
Return to Manage Infrastructure
Companies are organizations external to your own. External users must be associated with a company.
Companies can be specified as vendors, manufacturers, and other Company Types created via the Form Designer.
If your service desk interacts exclusively with users inside your organization, you need not set up additional companies.
Users with the “ServicePRO Administrator” privilege can add, update, or de-activate a company as needed.
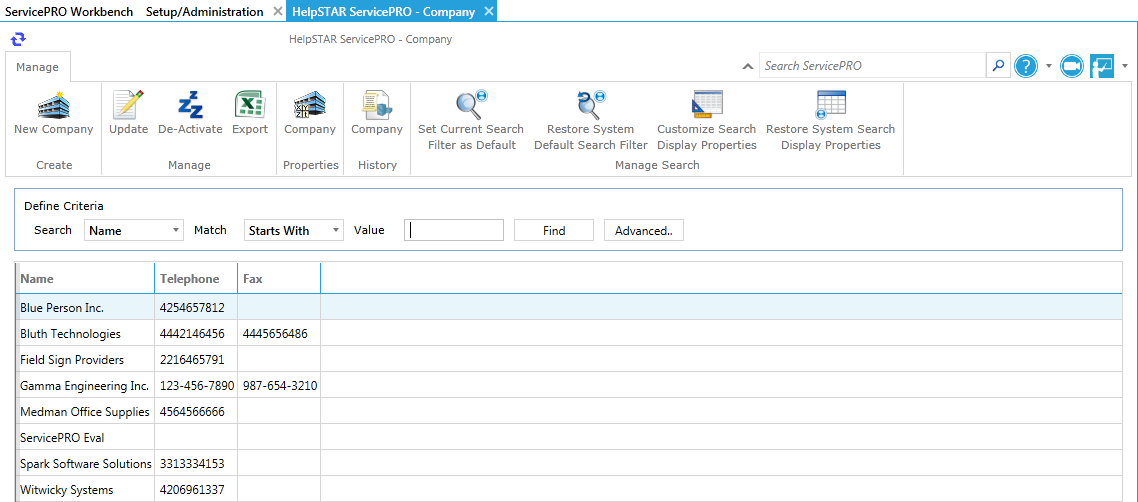
Navigation
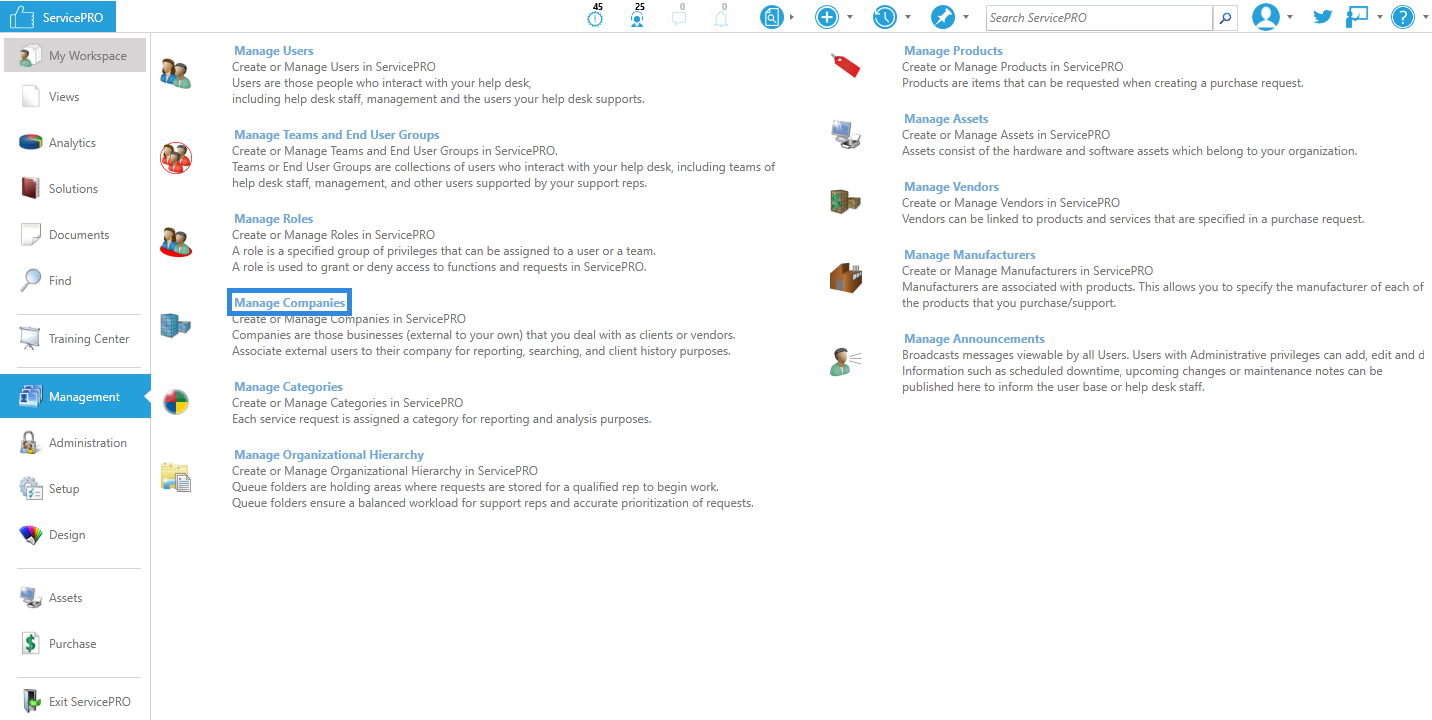
- Navigate to the backstage menu by clicking on the ServicePRO icon.
- From the Management tab, click on the Manage Companies option as highlighted below.
 Manage Companies Navigation
Adding New Companies
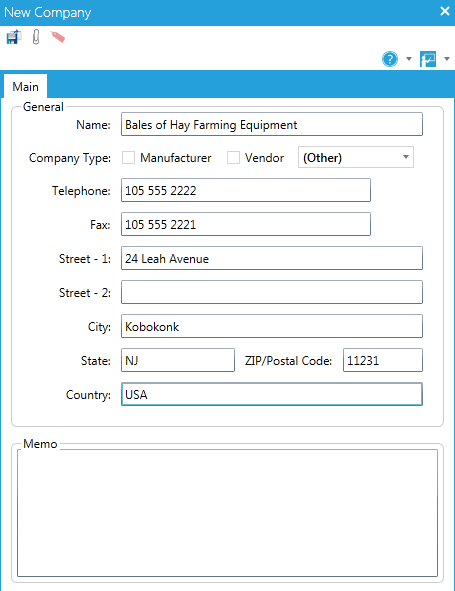
- Click on the New Company icon to add a new Company. The New Company window appears.
 New Company
 - Enter the Name of the company. This field is required.
- Select the Company Type. Leave the checkboxes unselected if they do not apply, such as when the Company is a Client. You can enable one or more of the following:
Manufacturer: A company that creates a product. By default, this field is selected. When Manufacturer is enabled, the Manufacturer Details tab is also available. The Manufacturer Details tab can contain custom fields to capture additional information about manufacturer. The custom fields can be created using the custom object designer.
Vendor: A company that sells the product. When Vendor is enabled, the Vendor Products and Vendor Details tabs are available. The Vendor Details tab can contain custom fields to capture additional information about vendor. The custom fields can be created using the Form Designer.
Other: This drop-down list is populated with additional Company Types created via the Form Designer.
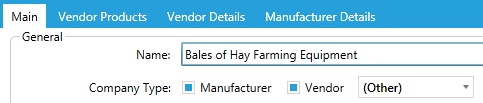
- You can select both manufacturer and vendor when a company makes the product/service and also sells it (for example, Dell makes and sells its products).
 Additional Company Type-related tabs
 - To place a purchase order with a vendor, classify the company as a vendor company type. When a company is designated as a vendor, a Vendor Products tab appears in the New Company window so you can add their products or services as shown in the figure below.
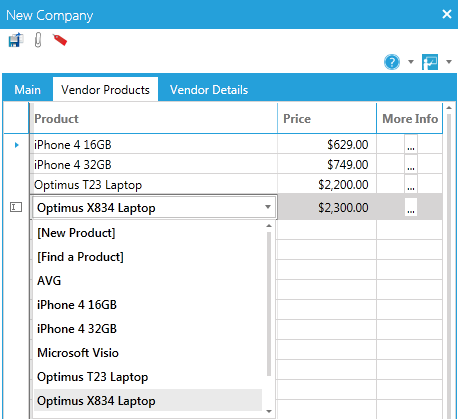 Adding Vendor Products
 - You can continue adding products by clicking on the row after each entry and adding a new line item. When you have entered all the products that this vendor offers, click the Save button. The window returns to the General tab.
- If you created your own company types via the Form Designer, you can select them from the other drop-down list.
- Enter all applicable contact information for the company in the fields provided.
- Click the Save icon in the Toolbar to save the record.
Managing Existing Companies
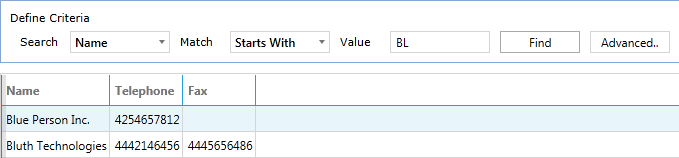
Select criteria from the Search and Match drop-down lists and enter a value in the Value field to help you narrow the list presented in the table. For example: Search: “Name” Match: “Starts With” Value: “BL”
Entering tells the system to search for all companies whose names start with the letters “BL”. In the figure above, the search would return a table listing only Blue Person Inc and Bluth Technologies.
Double-click on a company’s name from the listing to view company properties in a new window. The Ribbon Toolbar for Company Properties features the Management and History task groups, as shown in the figure below.
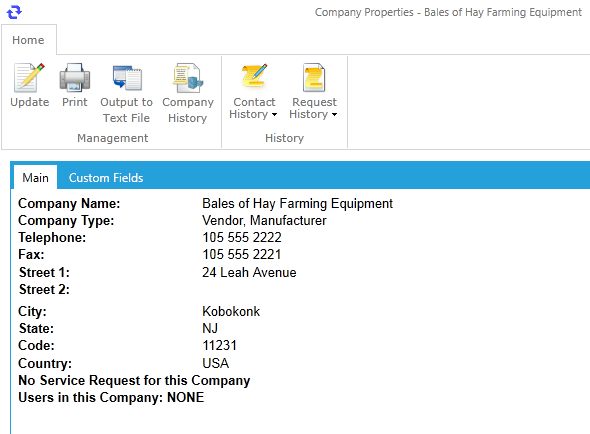
Company Properties
Under Manage Company Properties, the Ribbon Toolbar features two task groups:
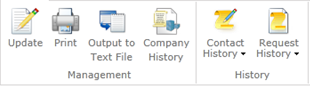
- Update: Edit company information.
- Print: Print the company properties.
- Output to Text File: Save company properties to a text file in a specified location.
- Company History: View the company’s request history.
History Task Group
- Contact History: This function allows you to view history (in chronological view) of all the contact recently made for a particular company. For example, a user can review a history of all of the recent contact in chronological order even if the contact is spread across several requests.
- Request History: This function allows you to retrieve a history of all requests logged by a selected company. From the company history you can view recent requests, reopen requests or check if a request has been logged for a particular company to avoid logging a duplicate request.
Ribbon Toolbar

The Ribbon Toolbar includes several task groups:
- Create
- Manage
- Properties
- History
- Manage Search
• Set Current Search Filter as Default: Set the current Company Search results as your default. This setting will be kept for subsequent searches.
• Restore System Default Search Filter: Return the default Company Search filter to its original state.
• Customize Search Display Properties: Select and customize properties to be displayed during searches.
• Restore System Search Display Properties: Restore displayed search properties to their original state.
De-Activate: De-Activate a Company from the listing.
Export: Export a document in XLS format.