Manage Organizational Hierarchy
Return to Manage Infrastructure
The Organizational Hierarchy module of ServicePRO allows you to create and update your company’s organization units (OUs), dispatch folders and queues folders.
Navigation
- Navigate to the backstage menu by clicking on the ServicePRO icon.
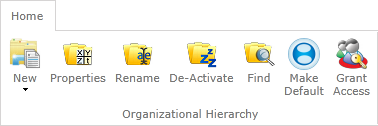
- From the Management tab, click on the Manage Organizational Hierarchy option as highlighted below.
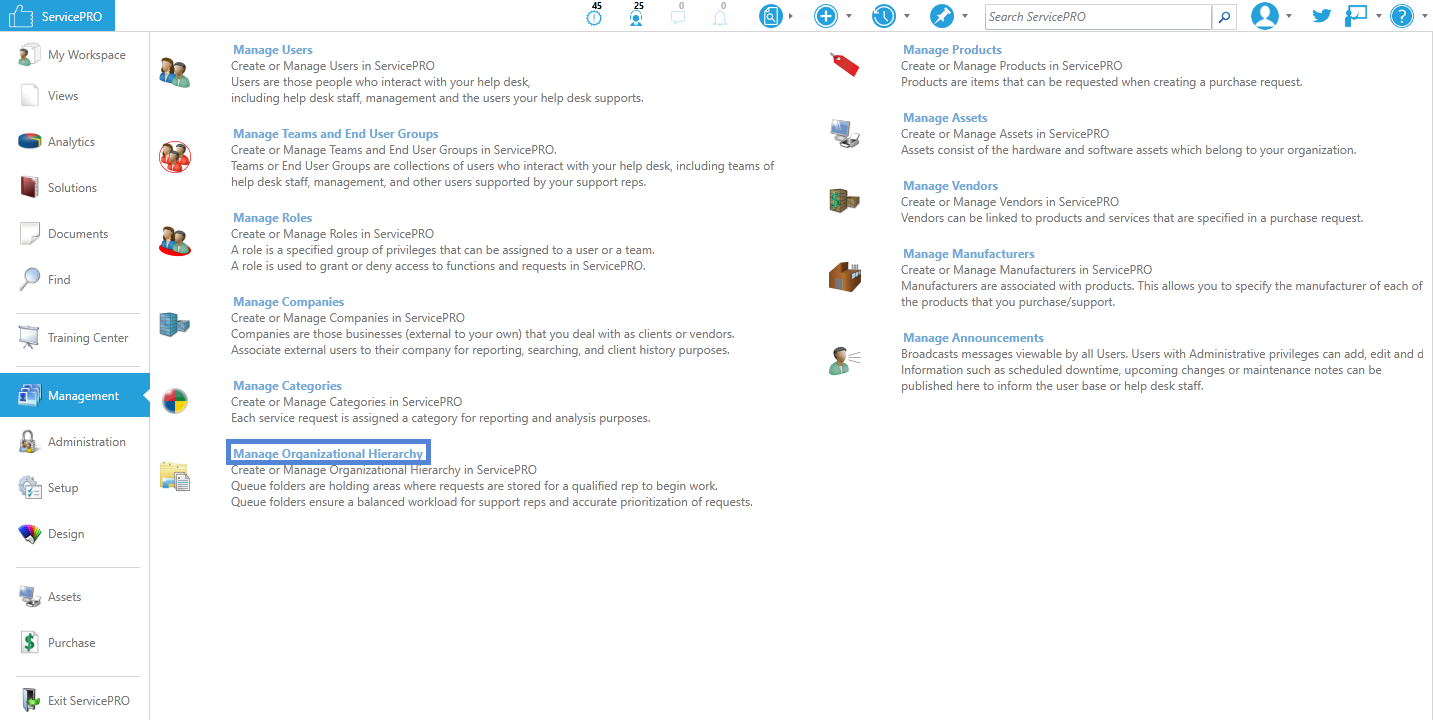 Manage Organizational Hierarchy Navigation
Organizational Units
OUs are subdivisions of a company. OUs are container for the internal users of ServicePRO and useful for reporting purposes, to monitor resource usage, and can also be used for cost allocation. Please note that Internal users must be associated with an OU.
Dispatch
Dispatch folder contains all the requests submitted by your end users (via email or the Cloud9/legacy web portal).
A user with the dispatch role on this folder will review a request, ensure that sufficient information is available to assign the request to a queue, as well as assign the priority of the request.
Generic Folders
Generic folders are waiting areas where service requests are stored until a Support Rep can work on them. Generic folders optimize workflow and group Support Reps with similar skills, thereby increasing the level and availability of service.
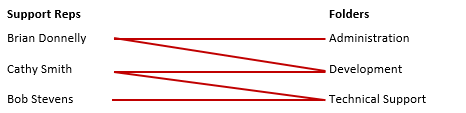
Generic folders have a “many-to-many” relationship. Support Reps can have roles on more than one generic folder and each generic can have more than one Support Rep assigned to it, as shown below:
A Support Rep Inbox folder will also be generated when a user is given the ‘Support Rep’ privilege. This inbox will appear in your Organizational Hierarchy. It is unique to each support rep and cannot be removed unless the ‘Support Rep’ privilege is removed from the user.
Adding New Objects to the Organizational Hierarchy
Use the following steps to add new OUs, dispatch folders, and generic folders to ServicePRO.
- Click on the New menu item in the top left corner.
- Select the OU/folder type that you want to create.
- Click the Save icon in the Toolbar to save the new OU or folder.
b. If you are creating a Dispatch folder select dispatch. Here, you may also choose to allow requests to be closed and/or approved within this folder. The Default Begin Work will always be ASAP because dispatch folders are the default location that tickets come into your help desk.
c. If you are creating a generic queue, select generic. Here, you may also choose to allow requests to be closed and/or approved within this folder as well as what wait state(s) are permitted on the requests within this folder
Managing Existing OUs and Folders
Managing Existing OUs and folders can be done through the Organizational Hierarchy toolbar located at the top of the screen. There are different options available depending on the type of folder that is selected.
Ribbon Toolbar Options based on selected OUs
Top Level of the Organizational Hierarchy
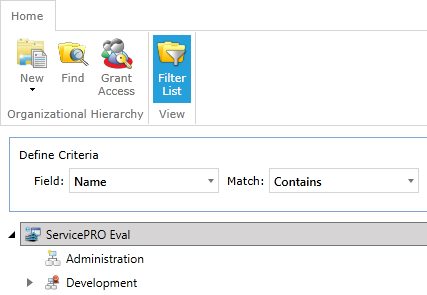
At the top level of the organizational hierarchy, you are provided with basic options:
- New – Create new Organizational Units, Dispatch, or Generic Folders
- Find – Search the list for items by text
- Grant Access – Change permissions and accessibility of folders for users
- Filter List – Toggle the Define Criteria box on or off
Organizational Units – Service Center
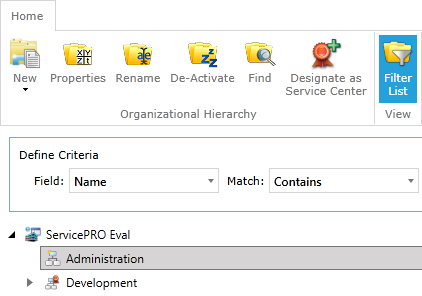
When an Organizational Unit (OU) is selected, you are provided with additional options in the Organizational Hierarchy task group:
- Properties
- Rename
- De-Activate
- Designate as Service Center
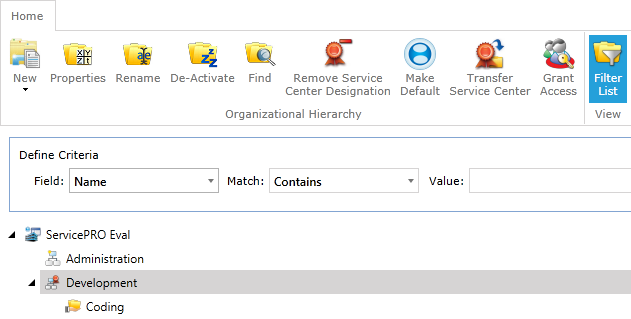
Organizational Unit – Service Center
An Organizational Unit can be designated as a Service Center. Doing so will enable icons in the Ribbon Toolbar:
- Remove Service Center Designation
- Transfer Service Center
- Grant Access
Generic Folders
For generic folders, one unique option is provided:
- Show Request
- Preview Pane – Below, Right, Grid Only
- Request Update – Save
Dispatch Folders – Default OU
For Dispatch Folders, options for toggling a folder as Default are available, depending on what it is currently set as.- Make Default
- Undefault
Ribbon Toolbar Option descriptions
Properties
To update an existing folder, click on the “Properties” option in the toolbar. This will display the properties for the folder that is selected. The properties on this screen can be updated. Once a change is applied it can be applied by clicking on the save button.
Rename
Clicking the re-name option from the toolbar will enable the option to change the name of a folder.
De-Activate
An existing folder can be De-Activated by clicking on the “De-Activate” option in the toolbar. This will move the folder to the list of de-activated Organizational Hierarchy items. Before a folder can be de-activated, it must not have any open requests in it. When you deactivate the folder, you will be prompted to move any closed requests left in that folder to another folder that's active.
Find
Will allow you to search for a specific folder.
Service Center Designation
Manage Service Center Designation for OUs with the following options.
• Designate as Service Center – Designate the OU as a Service Center (see below for additional details)
• Remove Service Center Designation – Remove the Service Center designation from the selected OU
• Transfer Service Center – Transfer the designation to another OU which will also move the entire folder structure to the new Service Center
Assigning Default Dispatch
By default the first dispatch folder created will be assigned as the default dispatch folder for that OU. There can be multiple dispatch folders under a single OU. If another dispatch folder is created, then it can be set as the default dispatch by selecting this option.
Select the new dispatch folder that was created. Click the ‘Make Default’ option from the Organizational Hierarchy toolbar.
To remove the default status from the folder, click the ‘Undefault’ option from the toolbar.
Grant Access
To assign permissions for an existing folder, click the ‘Grant Access’ option in the toolbar. This opens the Role Based Access Control window, allowing you to set user permissions for an organizational hierarchy
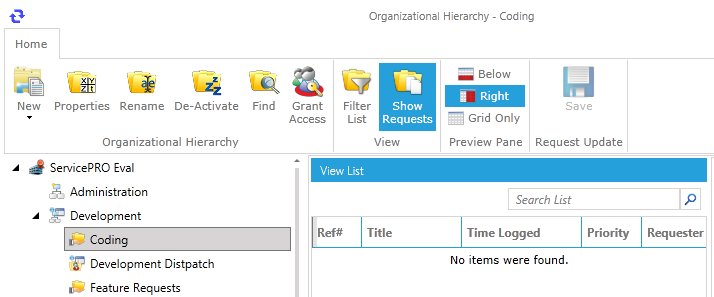
Show Request
Opens the View List pane. This allows you to browse for all requests placed in this folder. Selecting Show Requests will also enable two additional sets of options in the Ribbon Toolbar:
• Preview Pane – Set the position for the View List: Below, Right, Grid Only
• Request Update – Save an updated request
Designate an OU as a Service Center
OUs may be designated as a Service Center by selecting the OU and clicking on the “Designate as Service Center” button in the toolbar.
Designating an OU as a Service Center allows folders to be placed under the specified OU and creates a dispatch folder specific to that Service Center.
Creating a Service Center will allow generic folders, dispatch and OUs to be created under that Service Center. This can help to better organize the structure by creating a Service Center for each section of a company.
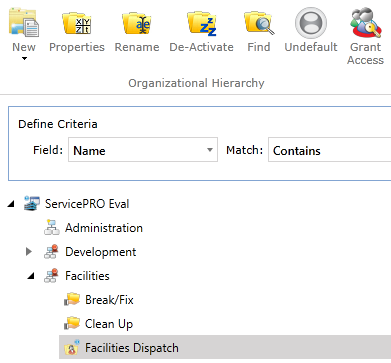
Views in Manage Organizational Hierarchy
To help filter your Organizational Hierarchy you can use the “Define Criteria” search field. This option will only be visible if you have “Filter List” enabled in the “Views” Toolbar.
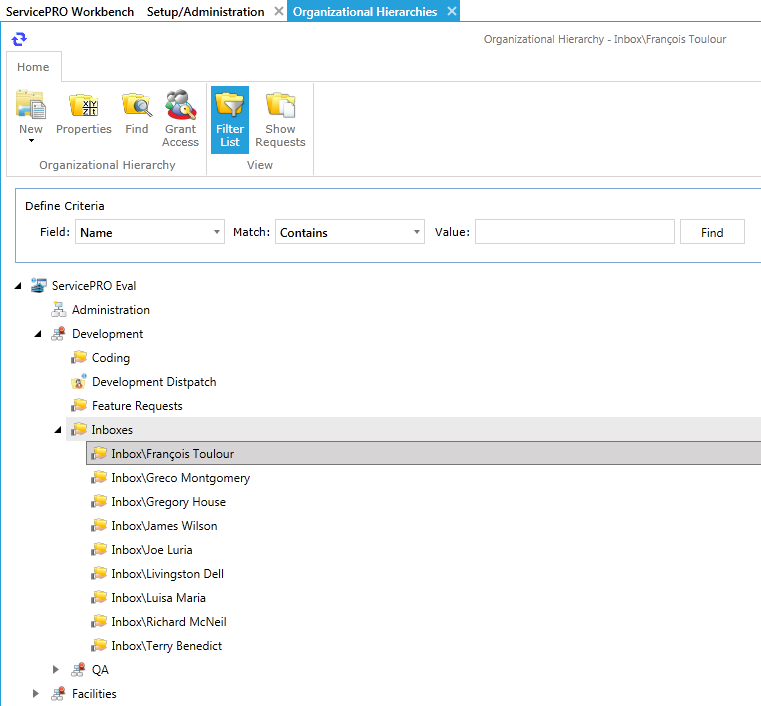
- From the ServicePRO Objects tab, click on the Manage Organizational Hierarchy option. The Organizational Hierarchies window appears as shown in Figure 1.
- In the Define Criteria work area, select criteria from the Search and Match drop-down lists and enter a value in the Value field to help you narrow the list presented in the table below this work area.
For example, entering: Search: “Name” Match: “Starts With” Value: “AC” tells the system to search for all OUs and folders whose names start with the letters “AC”. In the figure above, the search would return a table listing only the Accounting OU.
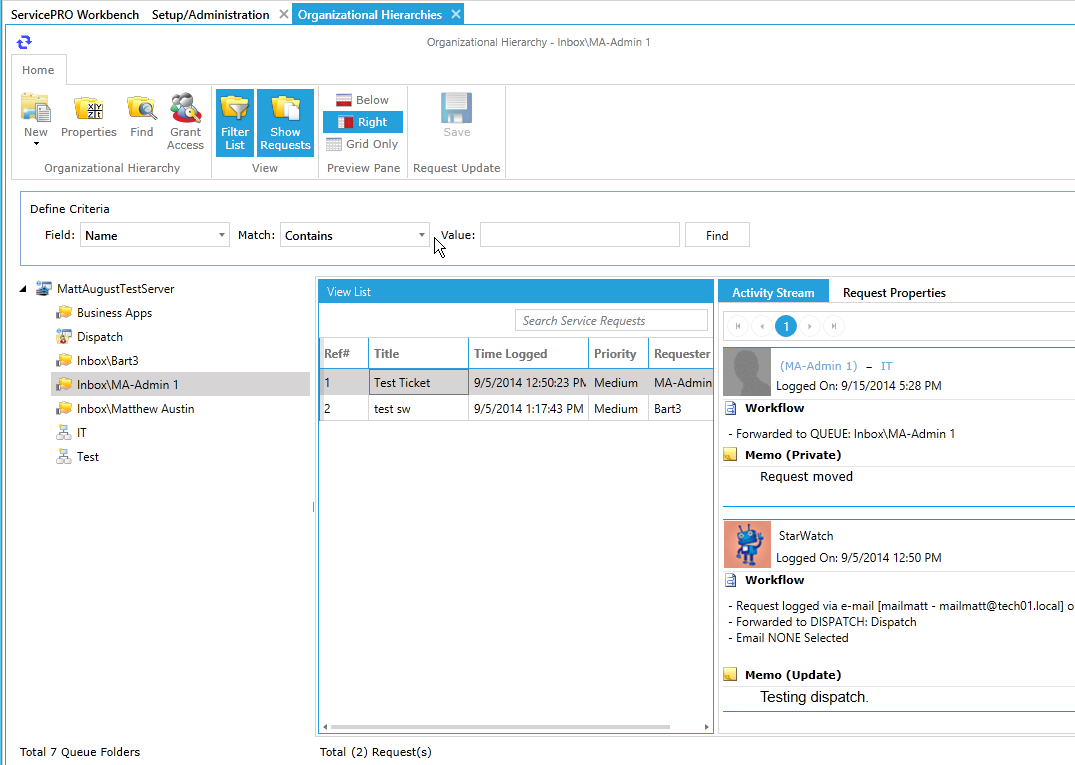
Service Requests currently located in specific folders can also be displayed by clicking “Show Requests” in the view toolbar. This will display the requests in each folder when you select them. See Figure 3 below.